The question is asked frequently, “How to transfer [fill in the format]." Welcome to this episode of “How It’s Done.”
Movie Films to Digital | Videotapes to Digital | VHS to DVD | Anything to DVD | Audio Tapes to Digital | Slides to Digital
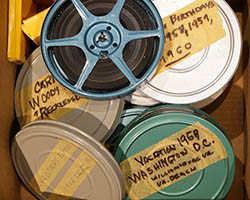
How to Transfer 8mm to Digital? How to Transfer 16mm to Digital?
 First, we have to define, do you mean 8mm movie film, or 8mm videotape? (If it’s 8mm videotape, see the VHS section, below.)
If you’re talking movie film, you then have to identify whether it’s Super 8mm, Regular 8mm or 16mm. Then...
- You need a projector for the right type of film. To transfer without getting interference bars, you need a variable speed projector. That’s because video runs at 30 frames per second and 8mm/16mm silent runs at 16 frames per second, and Super8 at 18 frames per second. To get a smooth picture on video you have to dial in the speed your camera likes. Sound films run at 24 frames per second and need a special camera that runs at that speed.
- Then you need a screen that’s perfectly smooth and not at all shiny, or a transfer attachment that goes on the projector lens.
- And you need a good digital video camera that can be white balanced to the projector lamp, with a lens that can sharply focus on the picture on the screen or attach to the adapter.
- Finally you need a computer with a large, fast hard disk and video editing software.
- Sync up projector speed with the camera, align it so there’s no parallax distortion, roll the film and the camera and you’ll have digital files on your camera.
- Copy the files to your computer, then use video editing software to export them to compressed files and you can watch the films and share them.
Either that or you spend $300 on a special transfer unit that transfers 8mm frame-by-frame – at 2 frames per second, meaning about 1 hour for a 50’ roll of film, and you must speed correct the film in your video editor.
Did I mention you’re going to need projector lamps? They’re rare, quite expensive, and some only last 6-12 hours. Or you retrofit your projector with an LED. And better hope the film doesn’t jam or need splicing, because then you need splicing accessories.
Or let Advent Digitizing transfer the films.
How to transfer VHS to digital? How to transfer 8mm Video to digital?
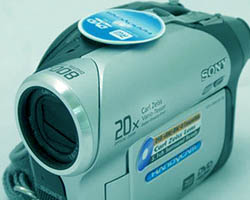
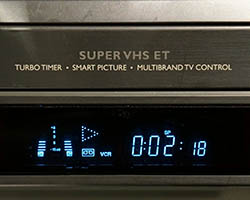 First you need a working VHS deck or an 8mm camcorder or player. Those are rare (8mm are more rare). If you don’t have one, you can probably find one cheap at a thrift store, though it might not work well. (If you're really lucky, you might find one of those dual-deck units that had a DVD recorder with a VHS player, and can make DVDs from VHS.) For VHS, it's best if you can find a Super VHS deck, because those have "S-Video" connectors that give you a cleaner video signal. For 8mm it's best to find a Hi-8 or Digital-8 unit for the same reason.
- If you can find one, you should use a Time Base Corrector. This is a device that stabilizes the video signal due to the fact that many camcorders have weak sync signals. The TBC makes the video as clean as possible. Most professional decks have TBC built in.
- You need an “Analog to Digital Converter.” This is a box that actually does the digital conversion. You attach the VCR and then connect the USB cord of the converter to your computer, install the drivers and the encoding software. These are fairly cheap, but the consumer-grade software that comes with the cheap ones captures highly compressed video. Most have S-video connectors, but some don't. And you need hookup cables.
- You need a computer with a large and fast hard disk or SSD. To get a good video transfer you need to capture at least 6 Megabytes per second. (Remember when a floppy disk held 1MB? You need at least 6 of those per second.) Professional editing software helps too.
- With all that hooked up, you just play on the VCR and record on the computer…and hope everything looks OK.
- Finally with the editing software you trim and render out the release files or make a DVD.
Or let Advent Digitizing transfer your home movie videotapes
How to convert VHS to DVD?
(How to convert any digital video file to DVD)
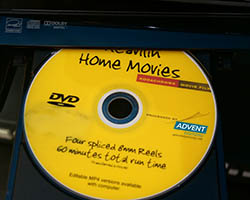 To convert VHS to DVD you must do the above steps first to create a digital file. To make a good quality DVD, you need to start with a digital file in an SD “i-frame” format like AVI or MOV in the DV codec. (If you start with highly compressed MP4 video, the DVD quality will suffer.) Then:
- With DVD authoring software, transcode and compress the master file to the DVD standard MPEG-2 codec
- Create menus and establish the logical flow
- Write the necessary file structure for the disk to an ISO image file
- Burn the files to release disks with a DVD burner.
- And if you want the disk labelled, create the design for the label and then print the copies on a specialized disk printer.
With VHS you have another eBay or thrift store choice: find a dual-deck DVD recorder that has a VHS player and DVD recorder in the same unit. You can use that to literally burn your DVD directly from your VHS. We used to do that, but we found that DVD recorders often use a nonstandard format, and they put menus on the disk that are ugly and can't be changed. That's why we do the 2-step process, and we can create custom menus and also have the digital files that will outlive the DVD disc.
Now if you have a Hollywood movie on VHS, you’ll probably run into a copy protection scheme and the video will become garbled as it transfers. It’s easier - and more legal - to find the film on DVD or digital download than to try to crack the copy protection – plus it’ll look better than VHS.
Or let Advent Digitizing make the disk transfer
How to Transfer DVD from camcorder mini-discs?
 For a time there were DVD camcorders. Those can be transferred by:
- Make sure the disk is “finalized” in the camera.
- Put the disk in a computer and explore the file structure.
- Look for “VOB” files and copy them to your hard drive.
- Using a video editor or media encoder, convert the VOB files to the MP4 format. Or if you want them on another DVD, use the VOB files with the DVD authoring program of your choice to create and burn another DVD layout. And, by the way, most mini-disc DVD camcorders used a non-standard video size, so if you're going to make online videos from the source material, you'll need to convert it to a standard size.
Or let Advent Digitizing make professional DVDs from your camcorder discs.
If you have a store-bought DVD that you want to transfer, however, you’re on very shaky ground legally. Not only are there copy protection schemes built into most of those, you’re not allowed to make copies for any reason other than personal use. Again it's cheaper, easier and more legal to buy the digital download.
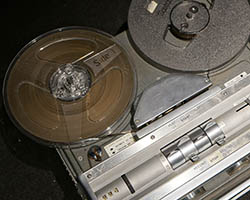
How to transfer reel-to-reel tape? How to transfer cassette tapes?
 Audio is more simple than video, to a point:
- To start with you need a reel-to-reel or cassette tape deck that has the correct track format and runs at the proper speed.
- The deck needs to be tuned up and working correctly.
- You need an analog-to-digital converter for audio. That’s a small box with audio inputs and a USB connector that hooks to your computer.
- Then you need audio editing software that can capture the digital signal.
- You will want to transfer first to an uncompressed audio format, so that you can use the master file for making CDs, editing, or noise reduction.
- Then you can save the audio in a compressed format (usually MP3) for use in media players.
You need to know how to balance input levels to minimize distortion and keep the noise floor low, how to make sure there’s no ground loops between machines, and how to deal with aging tape, which may need baking from “sticky shed.” You may also need to become an expert at noise reduction techniques. And above all keep your heads clean.
Or let Advent Digitizing transfer your audio tapes.
How to transfer 35mm slides?
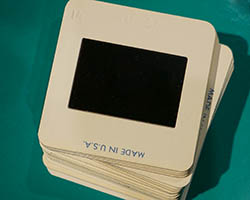 To transfer 35mm slides, there are several options.
- You can get a 35mm attachment for your flatbed scanner. These have a backlight, and you can scan through the glass on the scanner. Quality has never been really good doing that.
- Or, you can buy a specialized slide scanner which connects to your computer via USB. You slip in a slide, use the software to scan the slide (takes about a minute), then slip in another slide. Very tedious.
- Or, you can buy attachments for a digital camera that go on the lens. Slip in a slide, shoot a picture, and then go with the next one.
- Or, you can also project the slide on a screen and photograph it, but you get hotspots from the projector lamp, and it’s never quite the same.
- Or, If you owned a photo lab with slide duplicating equipment, you could replace the duplicating camera with a digital one and start digitizing slides quickly. You probably didn’t own a lab…but we do.
Or Let Advent Digitizing transfer your still images
Transferring media to digital can be done at home, but it takes a lot of money, hardware, skill, time and patience to do it right. Save yourself the headache and expense. Pack everything up and bring it over. Let Advent Digitizing make it right!
Get Started with Advent Digitizing